NATURAL LIGHT, VENTILATION and SECURITY SOLUTIONS for GARDEN BUILDINGS
Accessories to fit all New and Existing Timber Buildings, including Sheds, Summerhouses, Log Cabins, Work shops, Potting Sheds, Man Caves, She Caves, Gyms, Hobby Rooms, Play Rooms, Home Offices, Store Rooms, Pub Sheds, Garden Rooms, and so much more!
Installation Guides
Watch the Installation video to see just how simple Installation can be.
Activent K Series Windows and Skylights are designed to be installed from inside the building, under no circumstances is it nessacerry to climb upon the roof!
Quick Specifications:
Max External size 500mm x 500mm (Lid)
Less than 40mm Tall
4mm Tough Acrylic Glazing, 4mm Single Glass Or
18mm Double Glazed Glass
Internal hole to cut 400mm wide x 385 depth
Minimum Distance required between purlins (internal) 465mm wide x 450mm deep
All Windows and Sylights are identical in size and fitting
Download the full fitting instructions for your Opening Roof Window
Fitting Your Roof Window Standard.pdf
Adobe Acrobat document [799.8 KB]
Download the full fitting instructions for your Fixed Double Glazed Skylight
Fitting Your Glass Skylight.pdf
Adobe Acrobat document [634.9 KB]
Download the full fitting instructions for your Onduline & Coroline Roof Window & Skylight
Onduline Roof Window Fiitng Instructions[...]
Adobe Acrobat document [1.9 MB]
Full Written Instructions are included in the Kit, If you have any questions or are unsure at any time please feel free to contact us.
You could also employ a Handyman to install your window and many tradesmen websites are available.
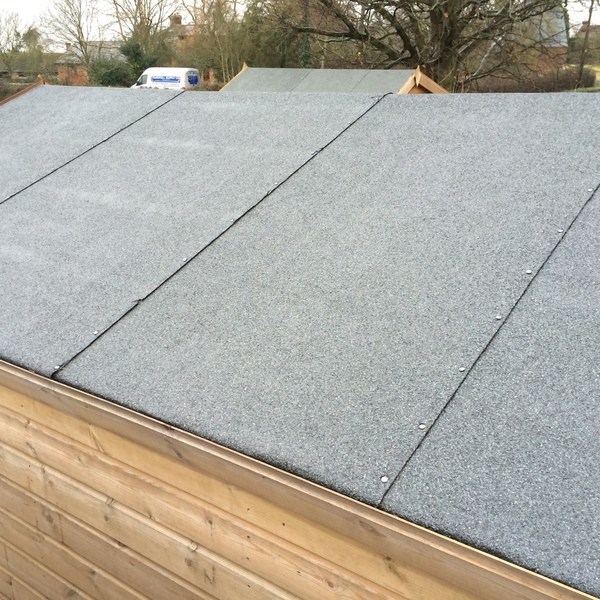 Felt Roof
-
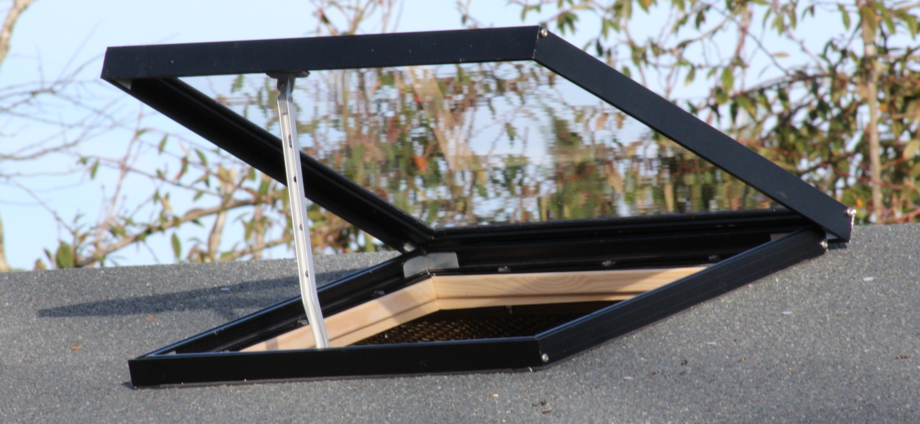
Select the best position for the vent ensuring that it will not be obstructed from below by purlins or above by overlapping felt joints.

The roof vent must not straddle a virtical joint, although it can stradle horizontal joints
 Window Hinge
2) Separate the lid section from the base unit (four off 8mm nuts with spring washers).
Put the lid, washers and nuts safely to one side for re-fitting later.
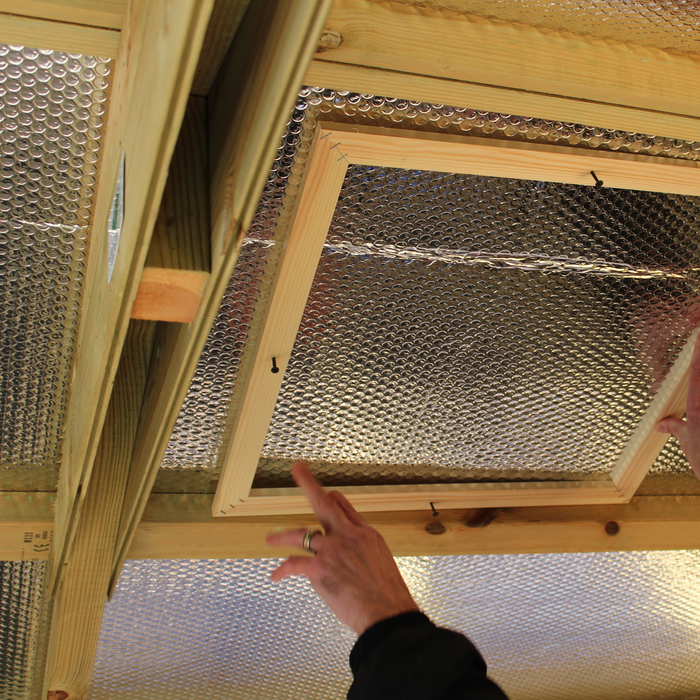 Timber Frame
3) Using the timber collar supplied, mark the internal area for removal (hole size385mm depth x 400mm wide).
 Template
4) From inside, drill holes 8mm in diameter in each corner and the middle to allow for a jigsaw blade.
 Cut out Template
5) Working from the inside and below, cut out and remove the marked section.
--------ADVISORY! WEAR SAETY GOGGLES TO AVOID FALLING DEBRIS ---------
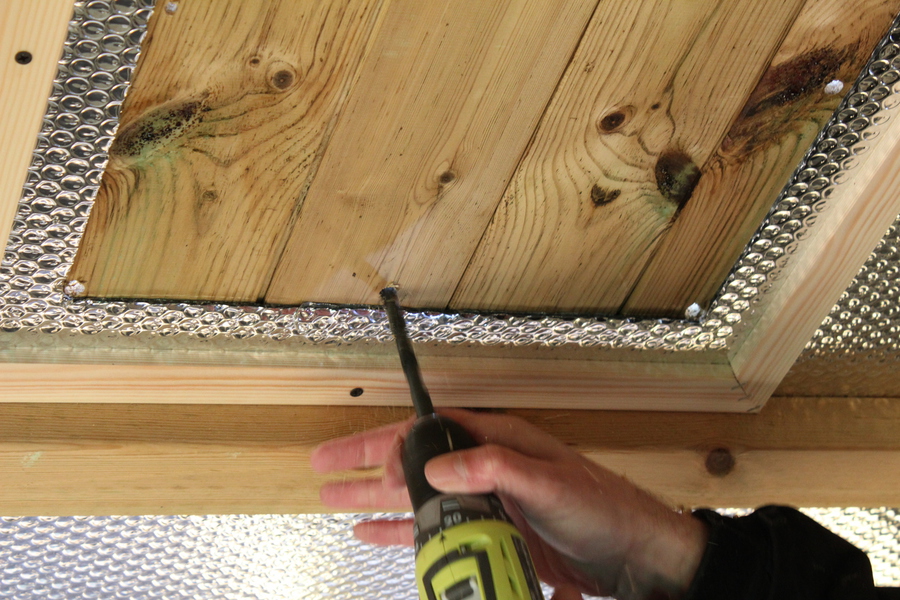
6) Fix the timber collar in place by using the four off countersink screws provided.
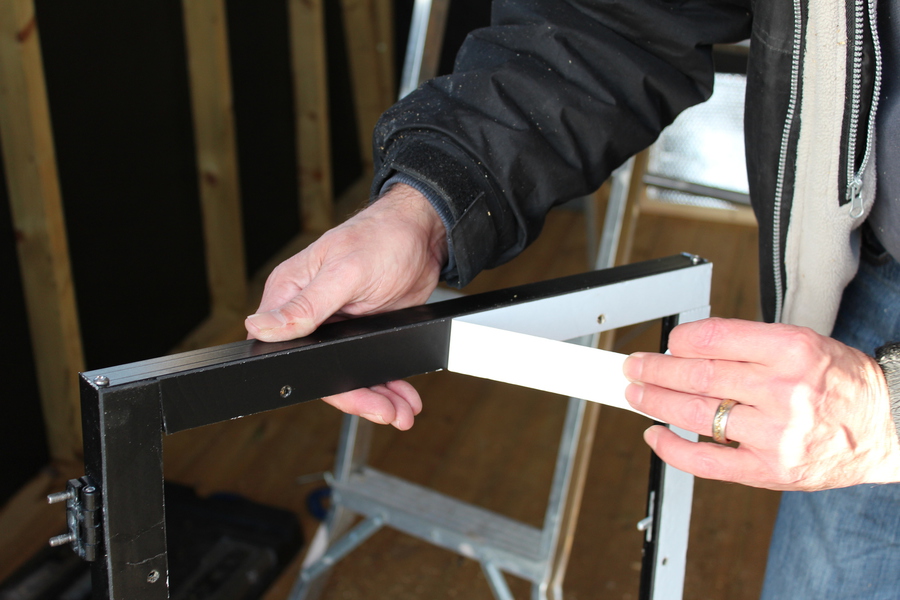
 "G" Clamp
7) Working through the hole from the inside, align the base unit from above with the timber collar. Drill through the pre-drilled holes in the base unit through the roof and colllar using a 6mm drill bit (it is best to “G” clamp this in position). After drilling all of the holes (twelve off), remove the clamps and bring the base unit back into the building. TIP: Use 7mm to widen and give clearance for the bolts through the wood only
 Foam Seal Tape
8) Re-assemble the lid to the base unit and remove the protective tape from the foam sealing gasket arround the base. Clean any loose material from the felt and base unit and pass the re-assembled vent through the opening and place in position. (On steep pitched roofs secure with ‘G’ clamps.)
Open the roof vent (securing with the stay to allow unobstructed access) slide all washers back into place before inserting the 6mm stainless steel bolts through the frame, roof and timber collar.
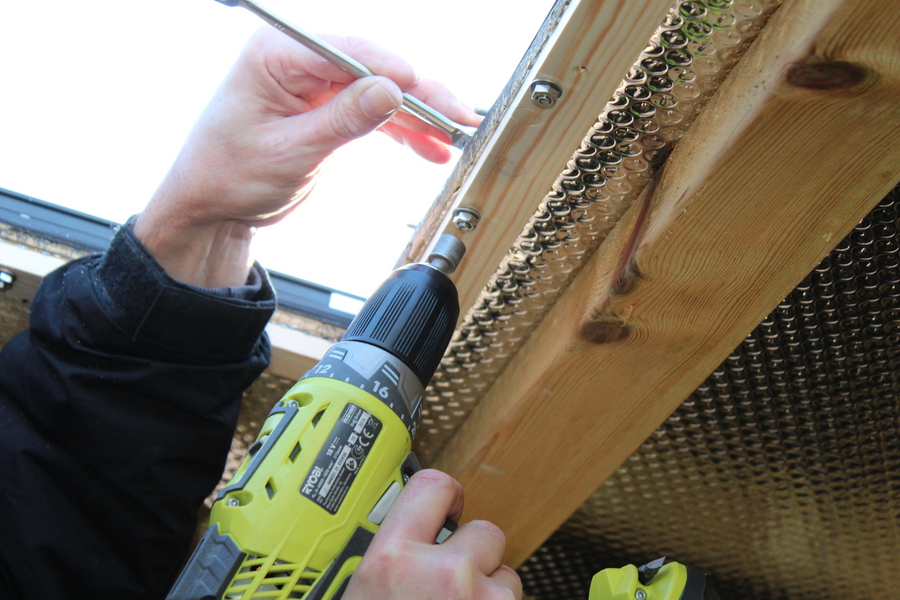 Bolts
Bolts
9) Fit washers and nuts from the underside and lightly tighten. Working clockwise and starting from the centre of the top, begin to tighten the nuts. (It is best to go around several times to ensure an even compression of the sealing foam).
When correct compression is achieved, a deviation will be noticed in the base unit and around the bolt heads/washers in the timber collar, this is to be expected and has been designed to give the correct compression.
 Trim
Trim
10) Fit the trim supplied to the internal cut edge of the roof.
For more fitting instructions check out the other pages "Felt shingles" "Insulated or Clad Roofs"
TOOLS REQUIRED;
-
6mm, 7mm & 8mm drill bits
-
Electric/battery drill
-
Electric/battery jigsaw
-
8mm spanner
-
2 x 10mm spanner
-
“G” Clamps
CLEANING:
-
The roof vent should only be washed using a sponge with plenty of clean water to avoid scratching.
-
Caustic detergents and solvents may damage the acrylic and your felt roof.
DO NOT LEAVE ROOF VENT OPEN IN HIGH WINDS
Citrus Sales
Unit 16, Hanger 3
Rudford Industrial Estate
Ford Road
Ford
West Sussex
BN18 0BD
01903 442 155
info@activent.co.uk
info@citrussales.co.uk